Welcome back! Let’s kick off our journey with a simple “Hello World”
Let’s Start with Setting Up the Project
Create a New Repo
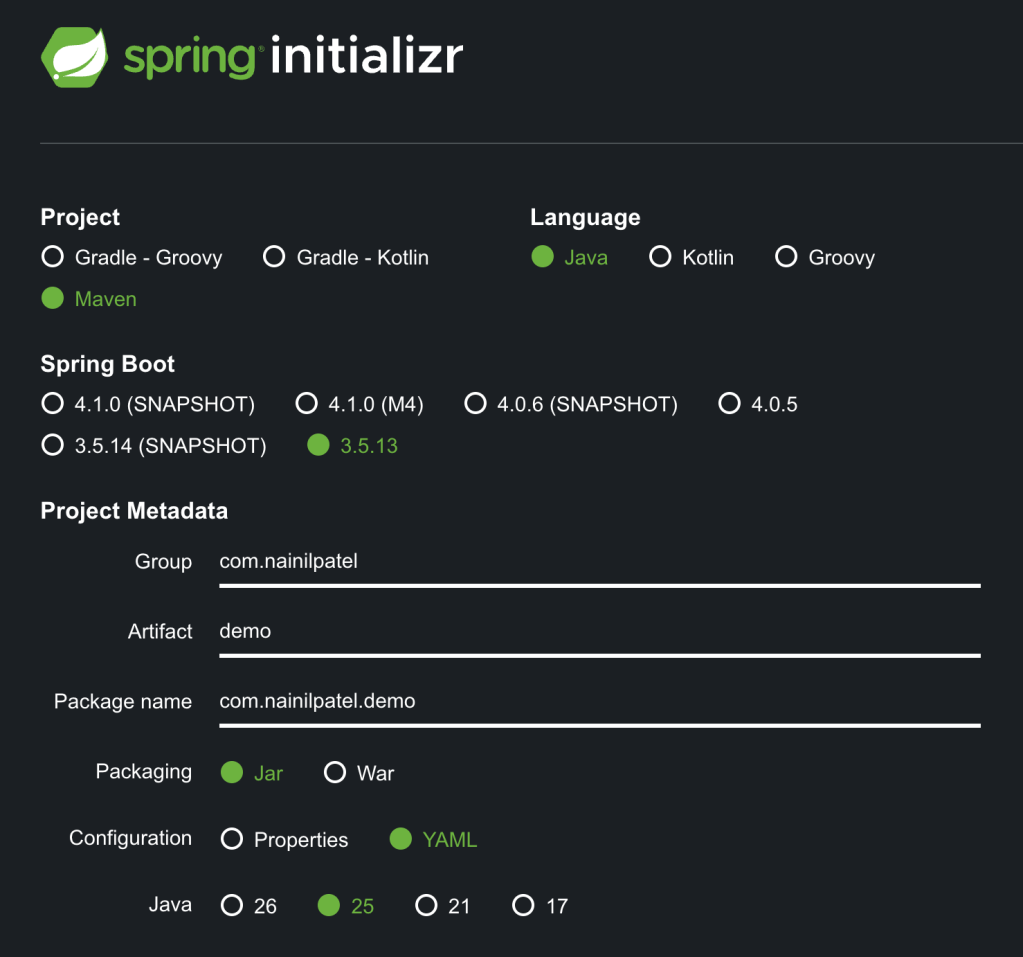
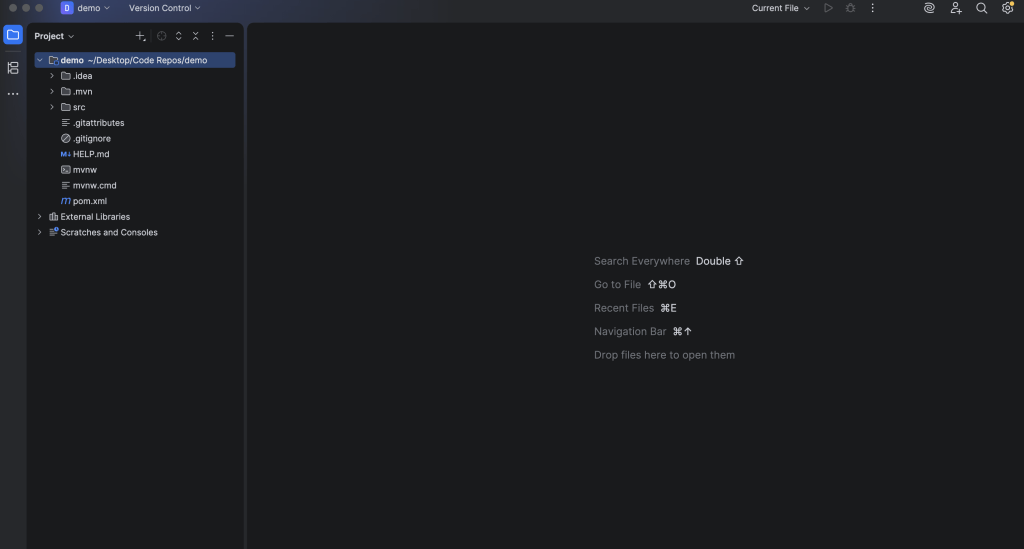
Open Up the Project using your favorite IDE
Navigate to the pom.xml and add the required dependencies
Spring AI BOM to Help Us Keep All the Spring AI Dependencies in Sync. You can place the spring-ai version in your properties section as:
<properties>
	<java.version>25</java.version>
	<spring-ai.version>1.1.3</spring-ai.version>
	<lombok.version>1.18.44</lombok.version>
</properties>
<dependencyManagement>
    <dependencies>
       <!-- Spring AI BOM -->
       <dependency>
          <groupId>org.springframework.ai</groupId>
          <artifactId>spring-ai-bom</artifactId>
          <version>${spring-ai.version}</version>
          <type>pom</type>
          <scope>import</scope>
       </dependency>
    </dependencies>
</dependencyManagement>
Spring Web to run the embedded server (Tomcat) and expose REST endpoints.
<!-- Spring Web -->
<dependency>
    <groupId>org.springframework.boot</groupId>
    <artifactId>spring-boot-starter-web</artifactId>
</dependency>


Starter Dependencies for the Model Provider of Your Choice, I've provided examples for Anthropic and OpenAI. Choose only one for now.

<!-- Anthropic -->
<dependency>
    <groupId>org.springframework.ai</groupId>
    <artifactId>spring-ai-starter-model-anthropic</artifactId>
</dependency>

<!-- OpenAI -->
<dependency>
    <groupId>org.springframework.ai</groupId>
    <artifactId>spring-ai-starter-model-openai</artifactId>
</dependency>
Lombok dependency and plugin to help us log
<!-- Lombok -->
<dependency>
    <groupId>org.projectlombok</groupId>
    <artifactId>lombok</artifactId>
    <version>${lombok.version}</version>
</dependency>

<plugin>
    <groupId>org.apache.maven.plugins</groupId>
    <artifactId>maven-compiler-plugin</artifactId>
    <configuration>
	<annotationProcessorPaths>
	    <path>
		<groupId>org.projectlombok</groupId>
		<artifactId>lombok</artifactId>
		<version>${lombok.version}</version>
	    </path>
	</annotationProcessorPaths>
     </configuration>
</plugin>
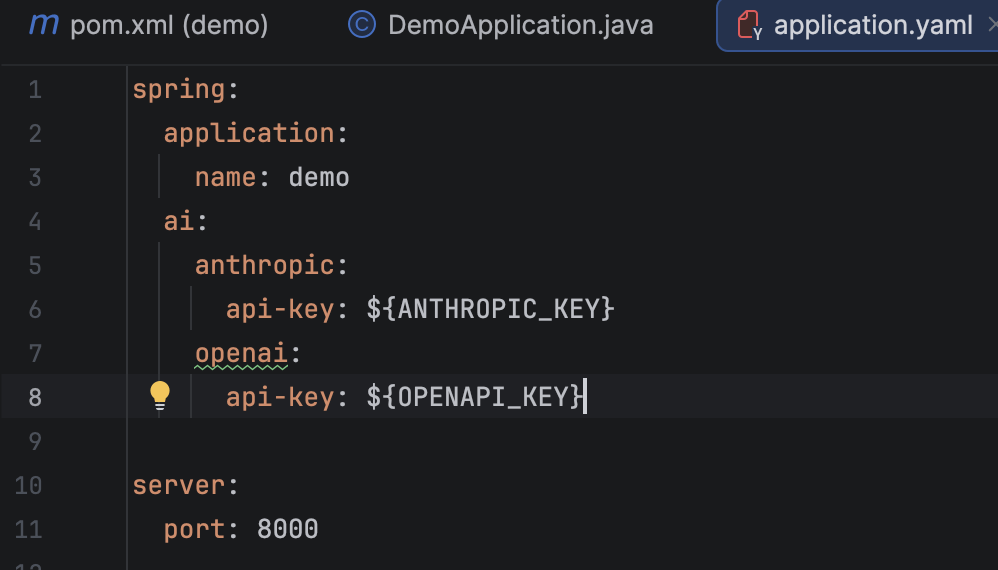
Add the required configuration in our application.yaml
At this stage, pick only one provider – this prevents bean conflicts. There is a way to keep multiple model providers, however, at this stage we only need one. I’ve given the example for Anthropic and OpenAI below. I’ll be keeping only the Anthropic Key in my case.
Now you may be wondering how do I get the actual API Key that we can use to populate the environment variable. The answer is to send me a message and I’ll give you mine.
Joking of course. Although if anyone wants to give me their API key with no spending caps, I’ll be more than happy to accept.
For the sake of brevity and keeping this tutorial relatively evergreen, search Google for the up-to-date method of procuring the API key for the provider of your choice. Search something like: “How to Obtain an Anthropic API key.”
Go ahead and follow the guide to get your API key before moving on to the next step.
As a reminder, if you’re pushing your code to a public repository such as on GitHub, don’t forget to keep the key as an environment variable and injected via a secrets manager. You don’t want someone to get their hands on your API key (especially with bots automatically scraping) and you waking up with a surprise bill on your hands.
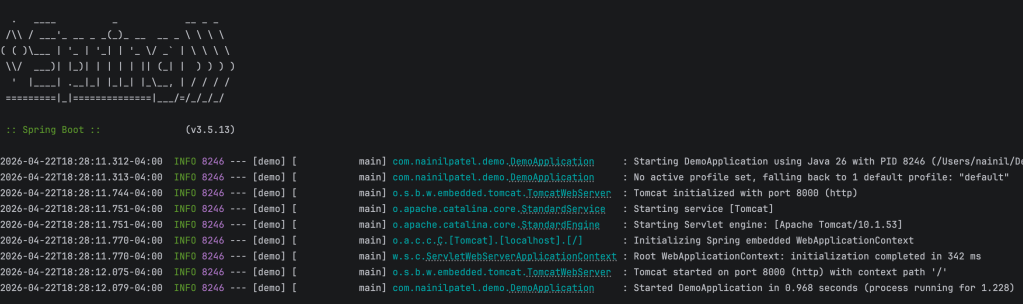
We now have everything we need to run the project
I’m running the application on http://localhost:8000
Let’s Now Talk to the LLM
Great job making it this far. Now let’s get to the fun stuff!
Let’s start by creating a configuration class with the ChatClient bean. This is how we’ll interact with the model.
In the future, we’ll explore how to customize this bean (and all the powerful things we can do with it). For now, this is all we need.
The provider starter we added to the pom.xml will help us create the ChatClient.Builder, and Spring will automatically inject it.
@Configuration
public class LlmConfig {

    @Bean
    public ChatClient chatClient(ChatClient.Builder builder) {
        return builder.build();
    }
}
Now let’s create a controller to talk to the model. The .user() argument represents your input to the model at runtime.
@RestController
@RequiredArgsConstructor
public class ChatController {

    private final ChatClient chatClient;

    @PostMapping("/chat")
    public String chat(@RequestBody String userInput) {
        return chatClient
                .prompt()
                .user(userInput)
                .call()
                .content();
    }
}
Now we’re ready to talk to the model! Let’s test the endpoint (I’m using Postman):
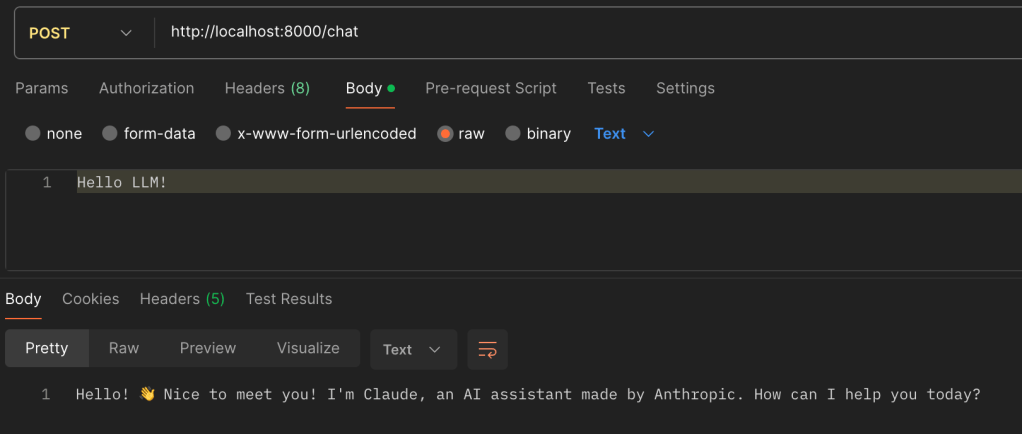
As you can see, we can now chat with the LLM and receive a response!
That’s all for this tutorial! Join me next as we explore how to have the LLM remember your previous messages.
